 Skip to content
-


Uses, Benefits, and Varieties of Wholesale Neodymium Magnets
Buy Wholesale Neodymium Magnets Online with Ease
Magnet Source makes it simple to source powerful neodymium magnets in bulk directly through our Shopify store. Ideal for industries like manufacturing, aerospace, medical tech, and electronics, our rare-earth magnets are available in discs, blocks, and rings — all at wholesale prices. Save time, money, and hassle by ordering the strongest magnets online, backed by fast shipping and trusted service. -


Why Magnets Matter for Your Business (and the future)
The magnetic materials market size has grown strongly in recent years. It will grow from $35.17 billion in 2024 to $37.11 billion in 2025 at a comp... -


Can the U.S. Make its Own Rare Earth Magnets?
When it comes to electric vehicle production, industrial usage, and the demand from consumers to have products that have stronger power to apply to...
FEATURED POST
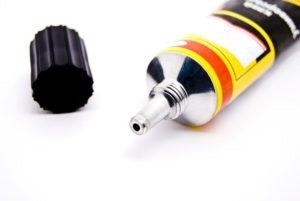
Gluing Magnets: Three Tips for Avoiding a Sticking Situation

Gluing Magnets:
Three Tips for Avoiding a Sticking Situation
By Shalea Hardison
Gluing magnets can be one sticky situation – and not just literally. It’s tricky to make sure the magnet stays where it’s attached, not where it’s attracted. We’ve found when it comes to adhering magnets, there are three key steps to creating a successful bond: preparation, selection and cure time.
Preparation
It’s often overlooked, but surface preparation makes a significant difference in achieving a strong surface bond between a magnet and the adhesive. Make sure the surface of the magnet is dirt and oil free by wiping it with rubbing alcohol. Magnets with smooth nickel coatings, like neodymium magnets, typically need some abrasion to improve adhesion. A quick swipe with a fine grit sand paper does the trick. Of course, be sure to clean off any residual dust. Taking a few minutes to prep the magnets can save hours of headaches down the road.
Selection
If you have been to the store to purchase adhesive recently, then you know the selection can be overwhelming. Choosing the correct adhesive is critical. There are several excellent options available, and selecting the right adhesive depends on the material you are affixing the magnet to.
For most surfaces, such as metal and wood, the typical strong adhesives such as two-part epoxies, Loctite, Liquid Nails, Super Glue, and Gorilla Glue all work well.
For craft projects with light-weight magnets, double-sided tape and Glue Dots hold just fine. Low temp hot glue can be used with ceramic magnets – but not with neodymium magnets. The temperature of the glue can lower the strength of those magnets. Plastics pose the most challenging surface to attach a magnet to. Choose an adhesive specifically designed for plastic. 3M, E6000 and Loctite make excellent choices.
As a point of reference, one of the adhesives we use on our neodymium magnets is a Low Surface Energy foam tape from 3M, making it effective for plastic surfaces.
Cure Time
This last step is the hardest – we all want to test our projects or speed up manufacturing, but none of the preparation and gluing matter if you rush right into use. Giving the adhesive proper time to cure is the last step in ensuring the bond holds tight. Follow manufacturer directions to determine this time. Keep in mind that high humidity environments and excessively thick applications of adhesive both slow down cure time.
For our own magnets with adhesive, we recommend 24 hours cure time. Because we understand the importance of adhesive, we offer some of our magnets with a pre-applied adhesive.
Do you have any other tips you would add? Let us know in the comments below.
Master Magnetics is your Magnet Source for over 20 million magnets. Check out all of our collections here.


Related Posts


Super glue has a very short shelf life which not many people realize. If the shelf life isn’t followed the glue decomposes into carbon monoxide and other toxins, and will take minutes or hours to initially dry instead of seconds. It should be stored below freezing at all times. Allow it to reach room temperature before opening, and dispose of it 30 days after opening.
If you’ve gone past the shelf life to get the glue to still set fairly quickly get a little spritzer bottle or something and put a little bit of rubbing alcohol in it. After attaching the items with glue lightly spritz the glued area with the rubbing alcohol. On contact with alcohol super glue hardens so fast the reaction produces heat and shortens curing time as a well.
A good design of experiments solves all of the headaches. For most non-MIL-Q applications we identified at least 10 factors at three levels. 1. Surfaces, 2. Temperature, 3. Pressure, 4. Adhesive characteristics, 5. Pull of magnet to steel or another lie-in-kind magnet, 6, Timing between tests, 7. Cleaning agents, 8. Time of application of temperature and pressure. to effect bonding, 9. Humidity, 10. Future cleaning agents after bonding. Use an ANOVA to detect interactions and side effects. Note that C[10,3] = 120 combinations of factors and at three levels the number f observations required jumps to C[10,3]*3^3= 3240 total experimental tests. Have fun! Imagine what the needs would be if even 2 or 3 more factors were added such as acrid environment, Shock, the vibration was added to the testing as factors. Or, one chooses to combine this testing with C{10,4]=210 combinations! Not all is lost as there are simplifications and deeplearning ANN’s that come to the rescue.
Once i have created enough surface area with abrasion to both surfaces, i have found that using 90% alcohol with a lint-free applicator then finishing off with a quick “stick-&-remove” with some clear gorilla [ or equivalent ] book tape provides an absolutely oil/dust free adherence. Especially for the removal of metal dust particles created from the abrasion of the magnet surface. Most have no clue as to how important surface preparation is when creating a bond & how much surface area can be created with some simple abrasion. Thank You for your correct & informative article !