Skip to content
- Cut out the background image to the size of the tin. Ours need to be 2 3/8”
- Adhere to the inside back of the tin with double-sided tape
- Attach any embellishments to what will be the bottom of the tin
- Add enough faux snow or glitter to cover the bottom quarter of the tin and close tin. Our containers closed pretty snugly, but add a thin layer of glue if you want to ensure it won’t open
- Glue a magnet to the back of the tin. We used a neodymium magnet. Neodymium magnetic discs with adhesive are a second option
- Begin by cutting the paper to the size needed to cover each opening. If you are using a mini muffin tin, cut 2 ¼" squares. For traditional muffin tins, cut 3 1/2” squares
- Embellish each square as desired, such as adding pull tabs, ribbons, and the number for the count down
- On the back of the square, attach a magnetic strip. We used pre-cut magnetic strips with pre-applied adhesive, which speeds the project along
- Cut out circles with craft paper and attach to the bottom of each muffin tin
- Fill the muffin tins with fun or yummy treats and close with the magnetic squares
-


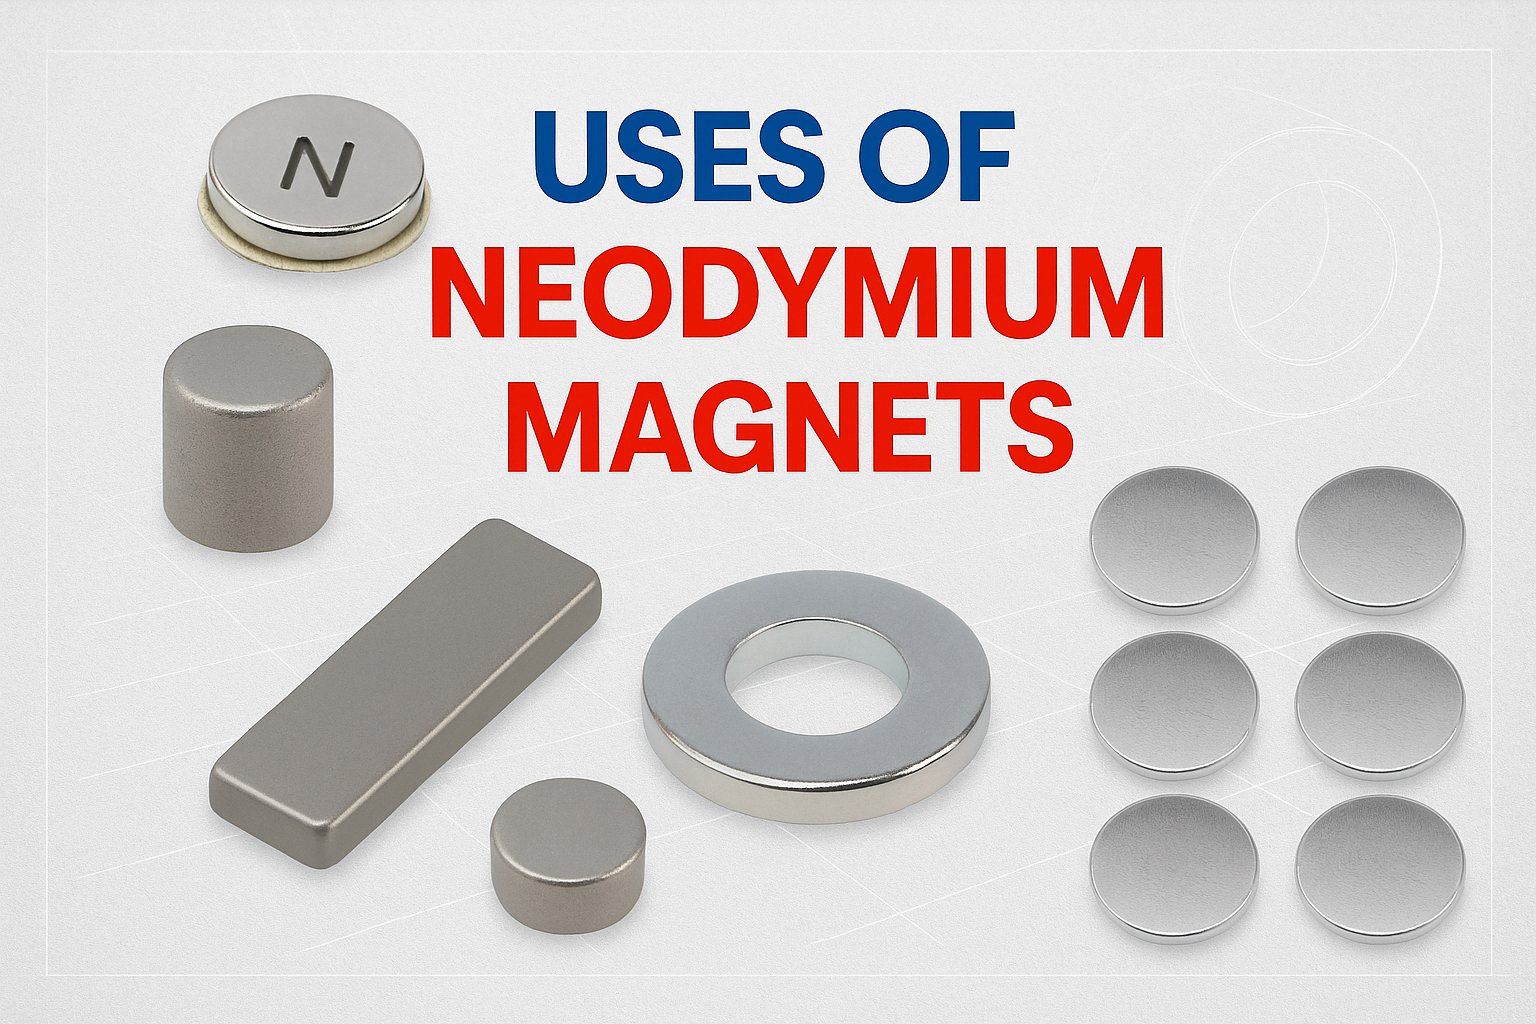
Uses, Benefits, and Varieties of Wholesale Neodymium Magnets
Buy Wholesale Neodymium Magnets Online with Ease
Magnet Source makes it simple to source powerful neodymium magnets in bulk directly through our Shopify store. Ideal for industries like manufacturing, aerospace, medical tech, and electronics, our rare-earth magnets are available in discs, blocks, and rings — all at wholesale prices. Save time, money, and hassle by ordering the strongest magnets online, backed by fast shipping and trusted service. -


Why Magnets Matter for Your Business (and the future)
The magnetic materials market size has grown strongly in recent years. It will grow from $35.17 billion in 2024 to $37.11 billion in 2025 at a comp... -


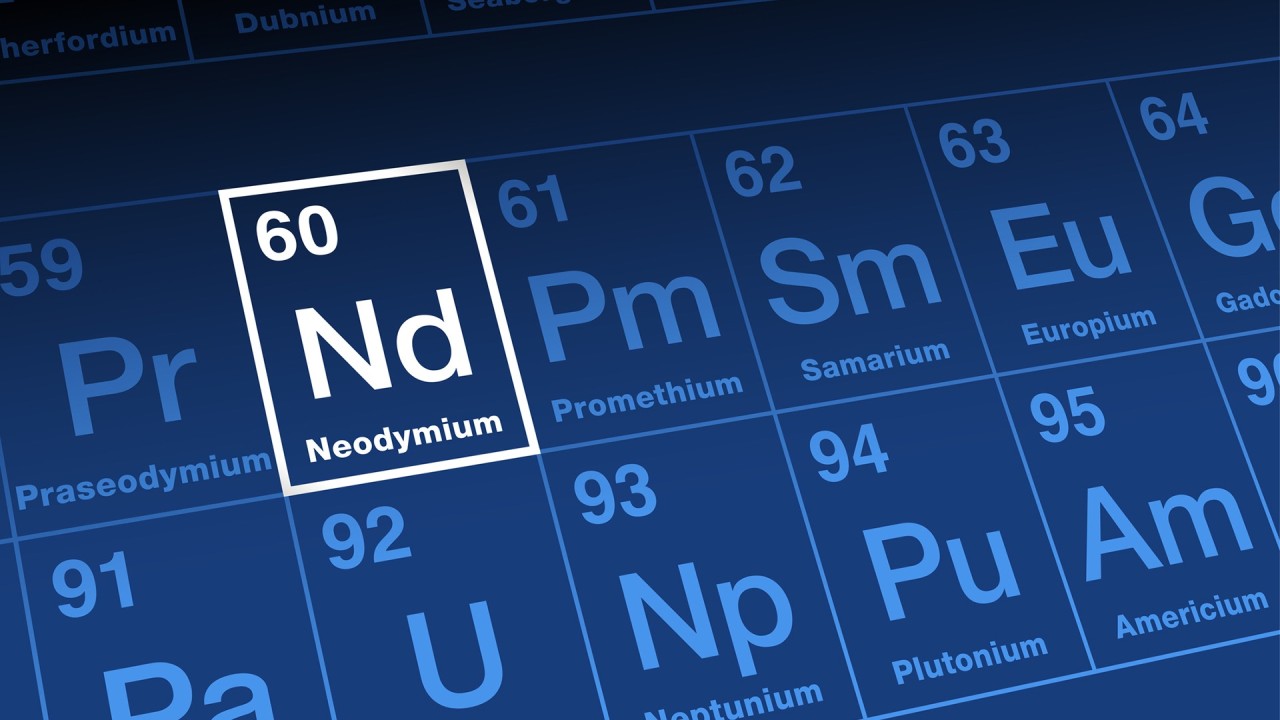
Can the U.S. Make its Own Rare Earth Magnets?
When it comes to electric vehicle production, industrial usage, and the demand from consumers to have products that have stronger power to apply to...
FEATURED POST
Spread the Cheer with Magnetic Holiday Crafts
Spread the Cheer with Magnetic Holiday Crafts
By Shalea Hardison
Holiday crafting and gift-giving go hand-in-hand, especially if kids can get involved. In the spirit of the season, we’re sharing two of our favorite magnetic holiday crafts sure to bring out your festive side.
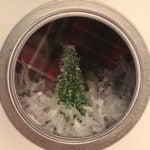
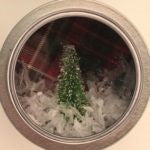
Magnetic Snow Globes
Sweet handmade gifts never go out of style. Magnetic snow globes make a simple, thoughtful, and customizable gift. Kids can even help create and assemble the scenes in the globe.
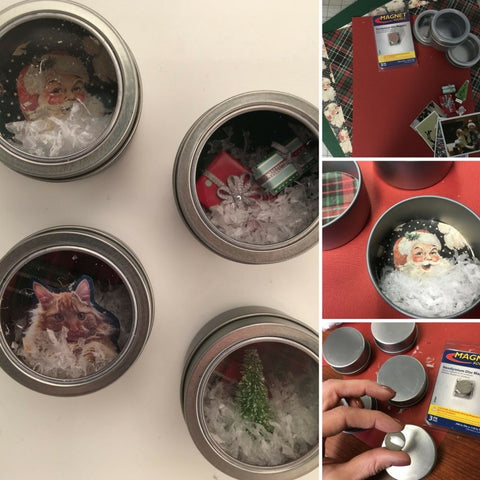
Here’s how we made ours:
Shake and enjoy this magnetic holiday craft as a fun way to post-holiday shopping lists, cards, and photos. These are pretty fun to make, and once you get to crafting, your imagination is only limited by the size of the tins.
Christmas Countdown Calendars
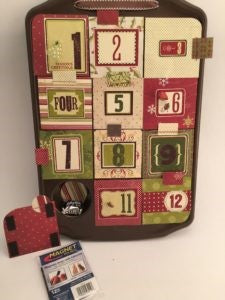
The anticipation of Christmas is a large part of the excitement of the season. Help build the excitement with a magnetic Christmas Countdown Calendar.
After gathering the needed supplies, here are the steps for creating a magnetic countdown to Christmas:
If using a regular-size muffin tin, you’ll need to continue the countdown again after twelve – but there is room for larger treats. However, a mini muffin tin lets you fit all 24 days on one sheet.
This craft is a little more detailed, but not difficult. Older kids might want to help make the calendar, but younger kids will enjoy opening the door each day for a treat!
Find these magnets at local craft and hardware stores throughout North America. A list of our retail partners’ stores can be found online (here). But if you need additional assistance, contact our sales team.


Related Posts